Why Does My Body Feel Stiff After Rest?

Have you ever got out of bed and felt like your body needs a few minutes to get moving? Or stood up after a long car journey or sitting at your desk and felt stiff and uncomfortable? Many people assume this means something is wrong: that a joint has “locked”, a muscle has tightened, or you’re getting more arthritic. But this is not always the case. In fact, stiffness can often be a normal response to how we use our bodies.

One of the biggest misconceptions is that feeling stiff always means something is physically tight or damaged. In reality, stiffness is a sensation created by a combination of factors, including how your muscles and joints are moving, how much activity your body is used to, and how your nervous system is responding to that movement.

Why do we feel stiff after being still?

Your body is designed to move regularly, but our bodies are also adaptable. If we spend a lot of time in one position or reduce our activity (e.g. when asleep, sitting at the desk, travelling, or relaxing on the sofa), our muscles and joints become accustomed to those demands. When we suddenly ask them to move further or do more, they may initially feel less comfortable or mobile. After a period of rest your joints and muscles have had less movement through their normal range, so your body is less prepared for sudden movement. 

As you start moving, your muscles warm up, your joints move through their available range, and your nervous system receives more information about movement, which can help the sensation of stiffness settle. This explains why the first few steps after getting out of bed can feel different from walking around 5-10 minutes later.

Woman stretching in bed

“If I feel stiff, I just need to stretch more”

Stretching can be a really useful tool and many people find it helps them feel more comfortable and mobile. However, stretching alone is not always the complete answer. A common pattern is that someone feels stiff, stretches the area that feels tight, gets some temporary relief, but then finds the same sensation returns later. This is because stiffness is not always caused by a muscle simply being “too short” or needing to be lengthened. Therefore a combination of regular movement (e.g. walking), mobility and stretching exercises, and strengthening exercises can be more effective than relying on stretching alone

What can help?

    • Change position regularly throughout the day: Aim to stand up every 30-45 minutes, even if its for a loo break or to pop the kettle on. You can even make small changes, such as standing up when making phone calls, or doing some seated stretches for mobility.
    • Keep well hydrated: This supports normal bodily function
    • Stay active: This helps to keep muscles strong and joints moving freer. A good starting point would be to go for 2x 10 minute walks per day, and gradually increasing this once you feel able.
    • Osteopathy: If stiffness is persistent, worsening, or it’s affecting your every day activities, an osteopathic assessment can help identify factors that maybe contributing to your symptoms. To book an osteopathy appointment click here.
    • GP: If stiffness is regularly lasting for a prolonged period after waking, particularly if it is accompanied by joint swelling, warmth, significant pain or other symptoms, it’s worth speaking to your GP. Your GP can assess your symptoms and decide whether any further investigations are appropriate.
    Woman walking whilst on the phone

    Feeling stiff after a period of rest doesn’t necessarily mean something is wrong or that your body needs “fixing”. Our bodies are adaptable, and giving them regular opportunities to move, stretch and strengthen can help us stay comfortable, mobile and better prepared for the things we want to do.

    PS: In case you missed it – Can Sound and Vibration Affect your Health?

    Can Sound and Vibration Affect Our Health?

    A lovely reader recently asked me whether certain sounds or vibrations are good for our health, and whether there are others we should try to avoid. It’s a brilliant question because it’s something many of us have probably wondered about. We all know that some sounds help us relax, while others leave us feeling frazzled, but why is that?

    Think about how a favourite song can lift your spirits, or how birdsong, waves or gentle rain can help you feel calmer. Equally, most of us know how draining constant traffic, loud neighbours or endless building work can be. Whenever we hear something, tiny vibrations travel through the air until they reach our ears. Our brains interpret those vibrations as music, speech, birdsong, or sometimes irritating noise!

    This is why in today’s blog we are exploring the relationship between vibration, sound and wellbeing. We’ll look at what the current research tells us, where the evidence is still evolving, and why the sounds that surround us may influence how we feel more than we realise.

    So, can sound affect our wellbeing?

    The simple answer is yes, but perhaps not always in the way we think.

    Research suggests that music and other pleasant sounds associated with nature can help many people feel more relaxed, lift their mood and reduce feelings of stress or anxiety. That’s one reason music is sometimes used in hospitals, care homes and other healthcare settings. However, when it comes to claims that one particular sound frequency has unique healing powers (such as 432 Hz or 528 Hz), there isn’t strong scientific evidence to support those claims. If you enjoy listening to these sounds and find them relaxing, that’s wonderful. It may simply be that taking time to pause, breathe and listen to something you enjoy is beneficial in itself.

    Rather than searching for one “magic frequency”, it may be more helpful to notice which sounds help you feel calmer, more focused or more at ease.

    Humming, singing… and your vagus nerve

    Have you ever caught yourself humming while cooking or singing along to the radio?

    Humming and singing naturally encourage slower, deeper breathing, helping activate the body’s natural relaxation response. They also create gentle vibrations around the throat and chest, and some researchers think these may contribute to the calming effects many people notice.

    If you’ve read my previous blog about the vagus nerve, you’ll know that slow breathing helps support our body’s natural “rest and digest” response. Humming or singing can be a simple, enjoyable way of encouraging that state, and the best part is it doesn’t matter whether or not you’re in tune!

    What about sound baths and relaxation apps?

    Sound baths, singing bowls and relaxation apps have become increasingly popular. Many people find them calming, and if you enjoy them, they can be a lovely way to make time for yourself. Although sound baths and singing bowls sound different to humming, it actually works in a similar way to singing by stimulating your vagus nerve to help you relax!

    In terms of apps, one I’ve experimented with is Healing Sounds (I’m not affiliated with it in any way!). It includes sounds linked to ‘delta, theta, alpha and beta brain waves’, which are real patterns of brain activity that scientists can measure. For example, delta brain waves are associated with deep sleep, while beta brain waves are linked with being awake and focused.

    Some apps are designed around the idea that certain sounds may gently encourage the brain towards different states, such as relaxation or focus. Scientists call this brainwave entrainment, and it’s an interesting area of research. At the moment, however, there isn’t strong scientific evidence to show that listening to specific sound frequencies reliably changes brain activity or produces particular health benefits.

    As long as we keep our expectations realistic there’s no harm in exploring what sounds helps us unwind. If you enjoy these sounds and they become part of a relaxing bedtime or mindfulness routine, they may be a helpful addition to your wellbeing toolkit. We all respond differently, so I’d genuinely love to hear your experiences if you’ve tried them.

    Are there sounds that aren’t so good for us?

    Yes! Long-term exposure to loud noise can damage hearing, while constant background noise may disturb sleep, increase stress and make it harder to concentrate. Although we can’t always control our surroundings, we can make small changes such as:

    • Turning off background TV or radio when it’s not needed.
    • Enjoying a few minutes of quiet each day.
    • Listening to music that helps you feel calm.
    • Wearing hearing protection when using loud DIY or gardening equipment.
    • Spending time outdoors and appreciating the sounds of nature.

    In summary

    There probably isn’t one particular frequency that’s been proven to heal us. What we do know is that the sounds we surround ourselves with can influence how we feel. Whether it’s humming while making a cup of tea, singing in the car, listening to your favourite music, enjoying birdsong on a walk, trying a sound bath or experimenting with a relaxation app, these small moments can help us pause, breathe and reconnect with ourselves.

    Can Stretching Help Ease Tightness Around the Lower Back and Pelvic Area?

    The answer is that it depends on the underlying cause, but there are a variety of gentle movements that some people find helpful when they experience feelings of stiffness or muscular tightness around the lower back and pelvis.

    In clinic, I often find that clients who spend a lot of time sitting at a desk, driving, or leading a predominantly sedentary lifestyle report feelings of stiffness around the hips, pelvis and lower back. Interestingly, people whose jobs involve repetitive movements, such as manual or physically demanding roles, can report similar feelings of tightness.

    This highlights an important point: both too little movement and too much of the same type of movement can sometimes contribute to feelings of stiffness and discomfort around the lower back and pelvic region.

    While stretching isn’t a cure-all, gentle movement can help some people feel more comfortable, improve confidence in movement, and temporarily reduce feelings of stiffness. The exercises below focus on areas that commonly influence comfort around the pelvis, including the hip flexors, gluteal muscles, lower back and surrounding tissues.

    As always, exercises should be performed within a comfortable range and should not significantly increase pain. If symptoms are persistent, worsening, or causing concern, it is important to seek appropriate healthcare advice.

    1. Pelvic Tilts

    Top image: neutral spine
Bottom image: flat back pelvic tilt
    • Lie on your back with your knees bent and feet flat on the floor. In this neutral position, the natural curve of your lower back will be slightly off the floor.
    • Create a flat back: Exhale and gently rock your hips toward your head. As you do this, you’ll feel your lower back flattening into the floor. Also draw your navel up and in towards your spine and keep it contracted around 50% (so you are able to breathe). If this is difficult to do, imagine you have a tail and you are trying to hide your tail between your legs.
    • Hold position for a couple breaths, then relax.
    • Repeat 10 times in a slow, controlled manner.

    2. Standing Hip Flexor Stretch

    Standing lunge hip flexor stretch with pelvic tilt
    • Stand in a staggered stance, with one foot in front of the other.
    • Keeping your chest upright, gently bend the front knee and shift your weight forwards (lunge position).
    • Create a ‘flat back’ by tilting your pelvis/tucking your tailbone in. 
    • You should feel a stretch at the front of the hip and upper thigh of the back leg.
    • Hold this position for a few breaths, then return to standing position.
    • Repeat on the other side.
    • Tip: Stretching the hip flexors is really handy if you’ve been sitting for a long time!

    3. Seated Figure-Four Stretch

    Seated figure-four stretch
    • Sit up straight with feet hip-width apart and feet flat on floor.
    • Bring one ankle over your opposite knee.
    • Hold your ankle in place with the opposite hand.
    • With your other hand gently push your bent leg down (just above the knee joint) until you feel a stretch in your hip/buttock/lower back.
    • To make the stretch stronger, keep your back straight then gently lean forwards.
    • Hold this position for a few slow, deep breaths.
    • Return to start position, then repeat on the other side.

    4. Cat-Cow Movement

    Above: Cow pose
Below: Cat pose
    • Start in Tabletop: Begin on your hands and knees in a neutral position. Align your wrists directly under your shoulders and your knees directly under your hips. Spread your fingers wide and keep a straight, flat back.
    • Cow Pose (Inhale): As you breathe in, let your belly drop toward the floor. Lift your chest and tailbone toward the ceiling, and gently gaze straight ahead.
    • Cat Pose (Exhale): As you breathe out, draw your navel toward your spine, tuck your tailbone, and round your back toward the ceiling (just like a stretching cat). Drop your head gently and look toward your hips.
    • Move comfortably between these positions for 8–10 repetitions.

    5. Child’s Pose (Wide, Narrow, and Side-Shift Options)

    Childs pose wide stance
    • Start on your hands and knees, then slowly sit your hips back towards your heels and reach your arms forwards.
    • You can adjust this position depending on what feels most comfortable:
      • Narrow stance: Keep your knees together or hip-width apart. This tends to create a more focused stretch through the lower back.
      • Wide stance (as shown in pic): Take your knees wider apart while keeping your big toes touching or feet apart. This variation can feel more open through the hips and pelvis.
      • Side-to-side variation: From child’s pose, gently walk your hands over to one side. This shifts the stretch into one side of the lower back and can help explore asymmetrical tightness. Hold for a few breaths, then slowly walk your hands to the other side.
    • Hold this position for several breaths.

    In Summary

    Stretching can be a useful way to temporarily ease feelings of tightness around the lower back and pelvis, but it is often only one piece of the puzzle. For many people, long-term improvements are best supported by a combination of regular movement, appropriate strengthening exercises, and lifestyle habits that encourage the body to move in a variety of ways throughout the day.

    If you’re looking for ideas on exercises that can help build strength around the hips and pelvis, take a look at my previous article on glute strengthening exercises.

    If you’d like personalised advice or support with ongoing stiffness or discomfort, osteopathic treatment may help as part of your wider management plan. To book an appointment, simply click here.

    How Long Should You Hold a Stretch?

    When it comes to stretching, most people focus on what area to stretch e.g calves, neck, spine, but far fewer think about how long to hold each stretch. Timing is one of the most important factors in whether stretching makes a difference to your flexibility. Different hold times affect different tissues in the body, so if you’ve ever felt like stretching doesn’t make much difference, adjusting the timing can change how effective your routine feels.

    Short Holds: Getting Things Moving (5–20 seconds)

    Short stretches are best thought of as preparation rather than change. Holding a position briefly can help increase circulation, wake the body up, and gently encourage movement through a joint. This makes them useful before activity, whether that’s light exercise, walking, or just starting your day. However, they don’t tend to improve flexibility or reduce longer-term stiffness in a meaningful way.

    Medium Holds: Working on Muscle (20–40 seconds)

    This is the type of stretching most people are familiar with. Holding a stretch for around 30 seconds gives your muscles time to relax and lengthen slightly, which can reduce the feeling of tightness. This is a good general approach for pre- and post-workouts. It mainly targets the muscle tissue itself, which is why it can feel helpful but doesn’t always resolve deeper or more persistent stiffness.

    Longer Holds: Allowing the Body to Settle (40-90 seconds)

    This zone is where stretching starts to become more effective for many people. Holding a position a little longer gives your nervous system time to stop signalling the muscle to tighten and allows the body to gradually let go of tension. You’re still working with muscle here, but in a more sustained way. This can be especially useful if you tend to feel generally tight or find that shorter stretches don’t seem to make much difference. I would recommend this length of time post-workout if you know certain muscles are prone to getting tight (e.g. for me I get tight hamstrings, so I would focus on holding stretches in this area for 40-90 seconds)

    Sustained Holds: Reaching the Deeper Tissues (90 seconds – 3+ minutes)

    When stretches are held for longer periods they begin to influence your fascia. Fascia is the connective tissue that surrounds and supports muscles and joints, and it plays a big role in how stiff or restricted the body feels. Unlike muscle, fascia responds best to slow, steady pressure over time. This is why slower, yin-style stretching can be particularly helpful for ongoing stiffness or a general lack of mobility. The aim here isn’t to stretch further, but to allow the body time to adapt. This means you should do the stretch at a comfortable intensity. If you have chronic pain it is likely you have fascial restrictions, so doing longer holds 3x per week should improve your flexibility and general tension over time. It also helps the body to ‘relax’, so if you are feeling stressed, doing these exercises with slow breathing can help you feel more grounded.

    Getting the Most Out of Your Stretching

    How you stretch matters just as much as how long you hold it. A lot of the frustration people feel with stretching comes down to a few simple habits that are easy to adjust.

    One of the most common is pushing too far into a stretch. It’s easy to assume that a deeper stretch will give a better result, but in reality the body often responds by tightening up to protect itself. This can actually limit the benefit. A better approach is to start at a gentle to moderate stretch, around a 3-5 out of 10 intensity level, and allow the stretching sensation to build gradually..

    Similarly, holding your breath or bracing in a position is usually a sign you’ve gone a bit too far. Stretching should feel sustainable. You should be able to breathe slowly and feel the body soften, especially if you’re holding the position for longer.

    The key idea is simple: stay comfortable, move slowly, and give your body time to respond. Matching the length of the stretch to your goal, whether that’s preparing to move or improving mobility, makes it much more effective.

    If you have any aches or pains and would like rehab advice tailored to your needs, book an appointment with us here.

    Do your hips feel tight? Why stretching is not enough

    “Tight hips” is something I hear almost daily in clinic, usually described as a pulling or discomfort around the outer hips or into the buttocks. For many people, the first instinct is to stretch. While that can feel helpful in the moment, it often doesn’t seem to last.

    If that sounds familiar, it’s usually a sign that stretching alone isn’t addressing the full picture. I will explain why that tightness keeps returning, and what can help you more in the long-term.

    Why Stretching Isn’t Always Enough

    Stretching has an important role in hip rehab. It can reduce tension, improve comfort, and is often a good place to start. However, if the tightness keeps coming back, it usually means there is more going on.

    In many cases, the muscles being stretched aren’t truly shortened. Instead, they are often working harder than they should be and becoming fatigued. Stretching may ease the sensation temporarily, but it doesn’t address why those muscles are under increased load in the first place.

    What’s Often Driving the Tightness

    A common contributing factor is prolonged sitting. When we spend much of the day at a desk or in the car, the hips aren’t moving through their full range, and certain muscles, particularly the glutes, can become under-active.

    When these muscles are not working as well as they should, they are often not as strong as they could be. As a result, other muscles around the outer hip begin to take on more of the workload. These muscles then become overworked and more sensitive, which is what many people experience as “tightness.”

    This creates an imbalance between underactive muscles that aren’t contributing enough, and overactive muscles that are doing too much. The body will often respond by increasing tension in these areas as a way of maintaining stability.

    What Actually Helps

    A combination of movement, stretching, and strengthening tends to be most effective.

    Stretching can help reduce discomfort, particularly for the outer hip and gluteal muscles. However, for long-term improvement, it is important to also restore strength and control so that the workload is more evenly distributed.

    Here’s an example of 3 simple-yet-effective hip strengthening exercises that you can try at home. Do each exercise 3 times per week, up to 3 sets of 10-15 reps. (If in doubt always consult with your healthcare provider before trying new exercises).

    Glute bridge 

    • Lie on your back with bent knees and the soles of your feet on the bed/floor. 
    • Gently rock your hips toward your head. 
    • Gradually lift up one vertebrae at a time off the floor.
    • Keep gluts and abdomen contracted and make sure your lower back does not hyperextend.
    • Hold for a few seconds.
    • Slowly your lower spine back down, one vertebrae at a time. 
    • Relax your pelvis once your spine is on the floor.

    Clam and side-lying leg raises

    • Lie on your side, with legs stacked and knees bent at a 45-degree angle. Your shoulders, hips and ankles will all be in line with each other.
    • Rest your head on your lower arm, and use your top arm to steady yourself.
    • Engage/gently squeeze your abdominals and glutes. This will help stabilize your spine and pelvis, and stop your hips going backwards.
    • Clam version:
      • Keeping your feet touching, slowly raise your upper knee as high as you can without shifting your hips or pelvis (the feeling of pushing your top hip forward will help). Don’t move your lower leg off the floor.
      • Pause for a few seconds, then slowly return your upper leg to the starting position.
      • Repeat for one full set before repeating the above steps for the other side.
    • Side-lying leg raise:
      • Straighten your top leg, squeezing your quad muscles (front of thigh).
      • Slowly lift your top leg up towards the ceiling, keeping your toes pointing forward to target the glutes.
      • Lift as high as comfortable without rocking your hips forward or backward. 
      • Slowly lower the leg back down, stopping just above the floor to maintain tension. 
      • Repeat for one full set before repeating on the other side.

    Sit-to-stand

    • Sit upright on a sturdy chair, feet flat on the floor.
    • Cross arms in front of your chest.
    • Press through your heels to stand up tall.
    • Slowly lower back down to the chair.
    • Intermediate version: When going from sit-to-stand, keep majority of your weight in your stance-side leg, but use your other foot to ‘kick-off’ to help you push off and rise to standing.
    • Advanced version: One leg sit-to stands – keep one foot off the floor at all times. Make sure you come back down slowly, and maintain good hip, knee and ankle alignment

    When done 3x per week, these exercises help address imbalances by encouraging the under-active gluteal muscles to do more of their role, which in turn reduces the strain on the overworked areas.

    Alongside this, general movement throughout the day plays an important role, don’t underestimate the benefit of a 15 minute walk! If you are sitting for long periods, aim to get up every 30-45 minutes and move around for a few minutes. The key is consistency – regular movement helps reduce the build-up of stiffness and muscle tension.

    When to Seek Further Advice

    If your symptoms don’t quite fit what’s been described here, it’s worth getting things checked. Pain that sits deeper in the groin, feels sharp or catching, or isn’t improving despite making some of these changes may need a closer look.

    It’s also worth being aware that buttock pain doesn’t always come directly from the hip itself. In some cases, it can be referred from the lower back, particularly if a nerve is involved. This isn’t usually anything serious, but it can change how the issue is managed.

    If you’re not seeing progress, getting some guidance can help. You can book an appointment online or get in touch with us to discuss what might work best for you.

    A Different Way to Think About “Tight” Hips

    If there’s one thing to take away from this, it’s that tightness isn’t always just about needing to stretch more. In many cases, it’s a sign that certain muscles are working harder than they should, often because others aren’t doing enough.

    That’s why a combination of movement, stretching, and strengthening tends to work better than focusing on one thing alone. By improving how the hip is supported and sharing the workload more evenly, the feeling of tightness often settles more naturally.

    Published 21/04/2026

    PS: If you feel like you need a ‘mental reset’ check out my article “A Gentle Spring Clean for Your Health“.

    A Gentle Spring Clean for Your Health

    Have you noticed how different everything feels once the days start getting longer, warmer and sunnier again? It’s also quite common for our energy, sleep, or daily routines to feel slightly out of sync after the darker months. The good news is that spring naturally gives us an opportunity to reset! So here are five simple ways to gently “spring clean” your health and help you feel refreshed, focused and energised.

    Spend some time in natural daylight

    Natural daylight plays an important role in regulating the body’s internal clock, which influences sleep, energy levels and mood. The morning is most effective for this, so try having breakfast in the garden or go for a morning walk!

    Over the spring and summer it is also important to build up your vitamin D reserves. This helps to support your bones, muscles, mood, immunity and inflammatory regulation. Even on a cloudy day, as little as a 10-15 minute walk or sitting outside at lunchtime can be sufficient. Just make sure your arms and face are exposed so your skin can absorb the rays!

    Take a walk somewhere green

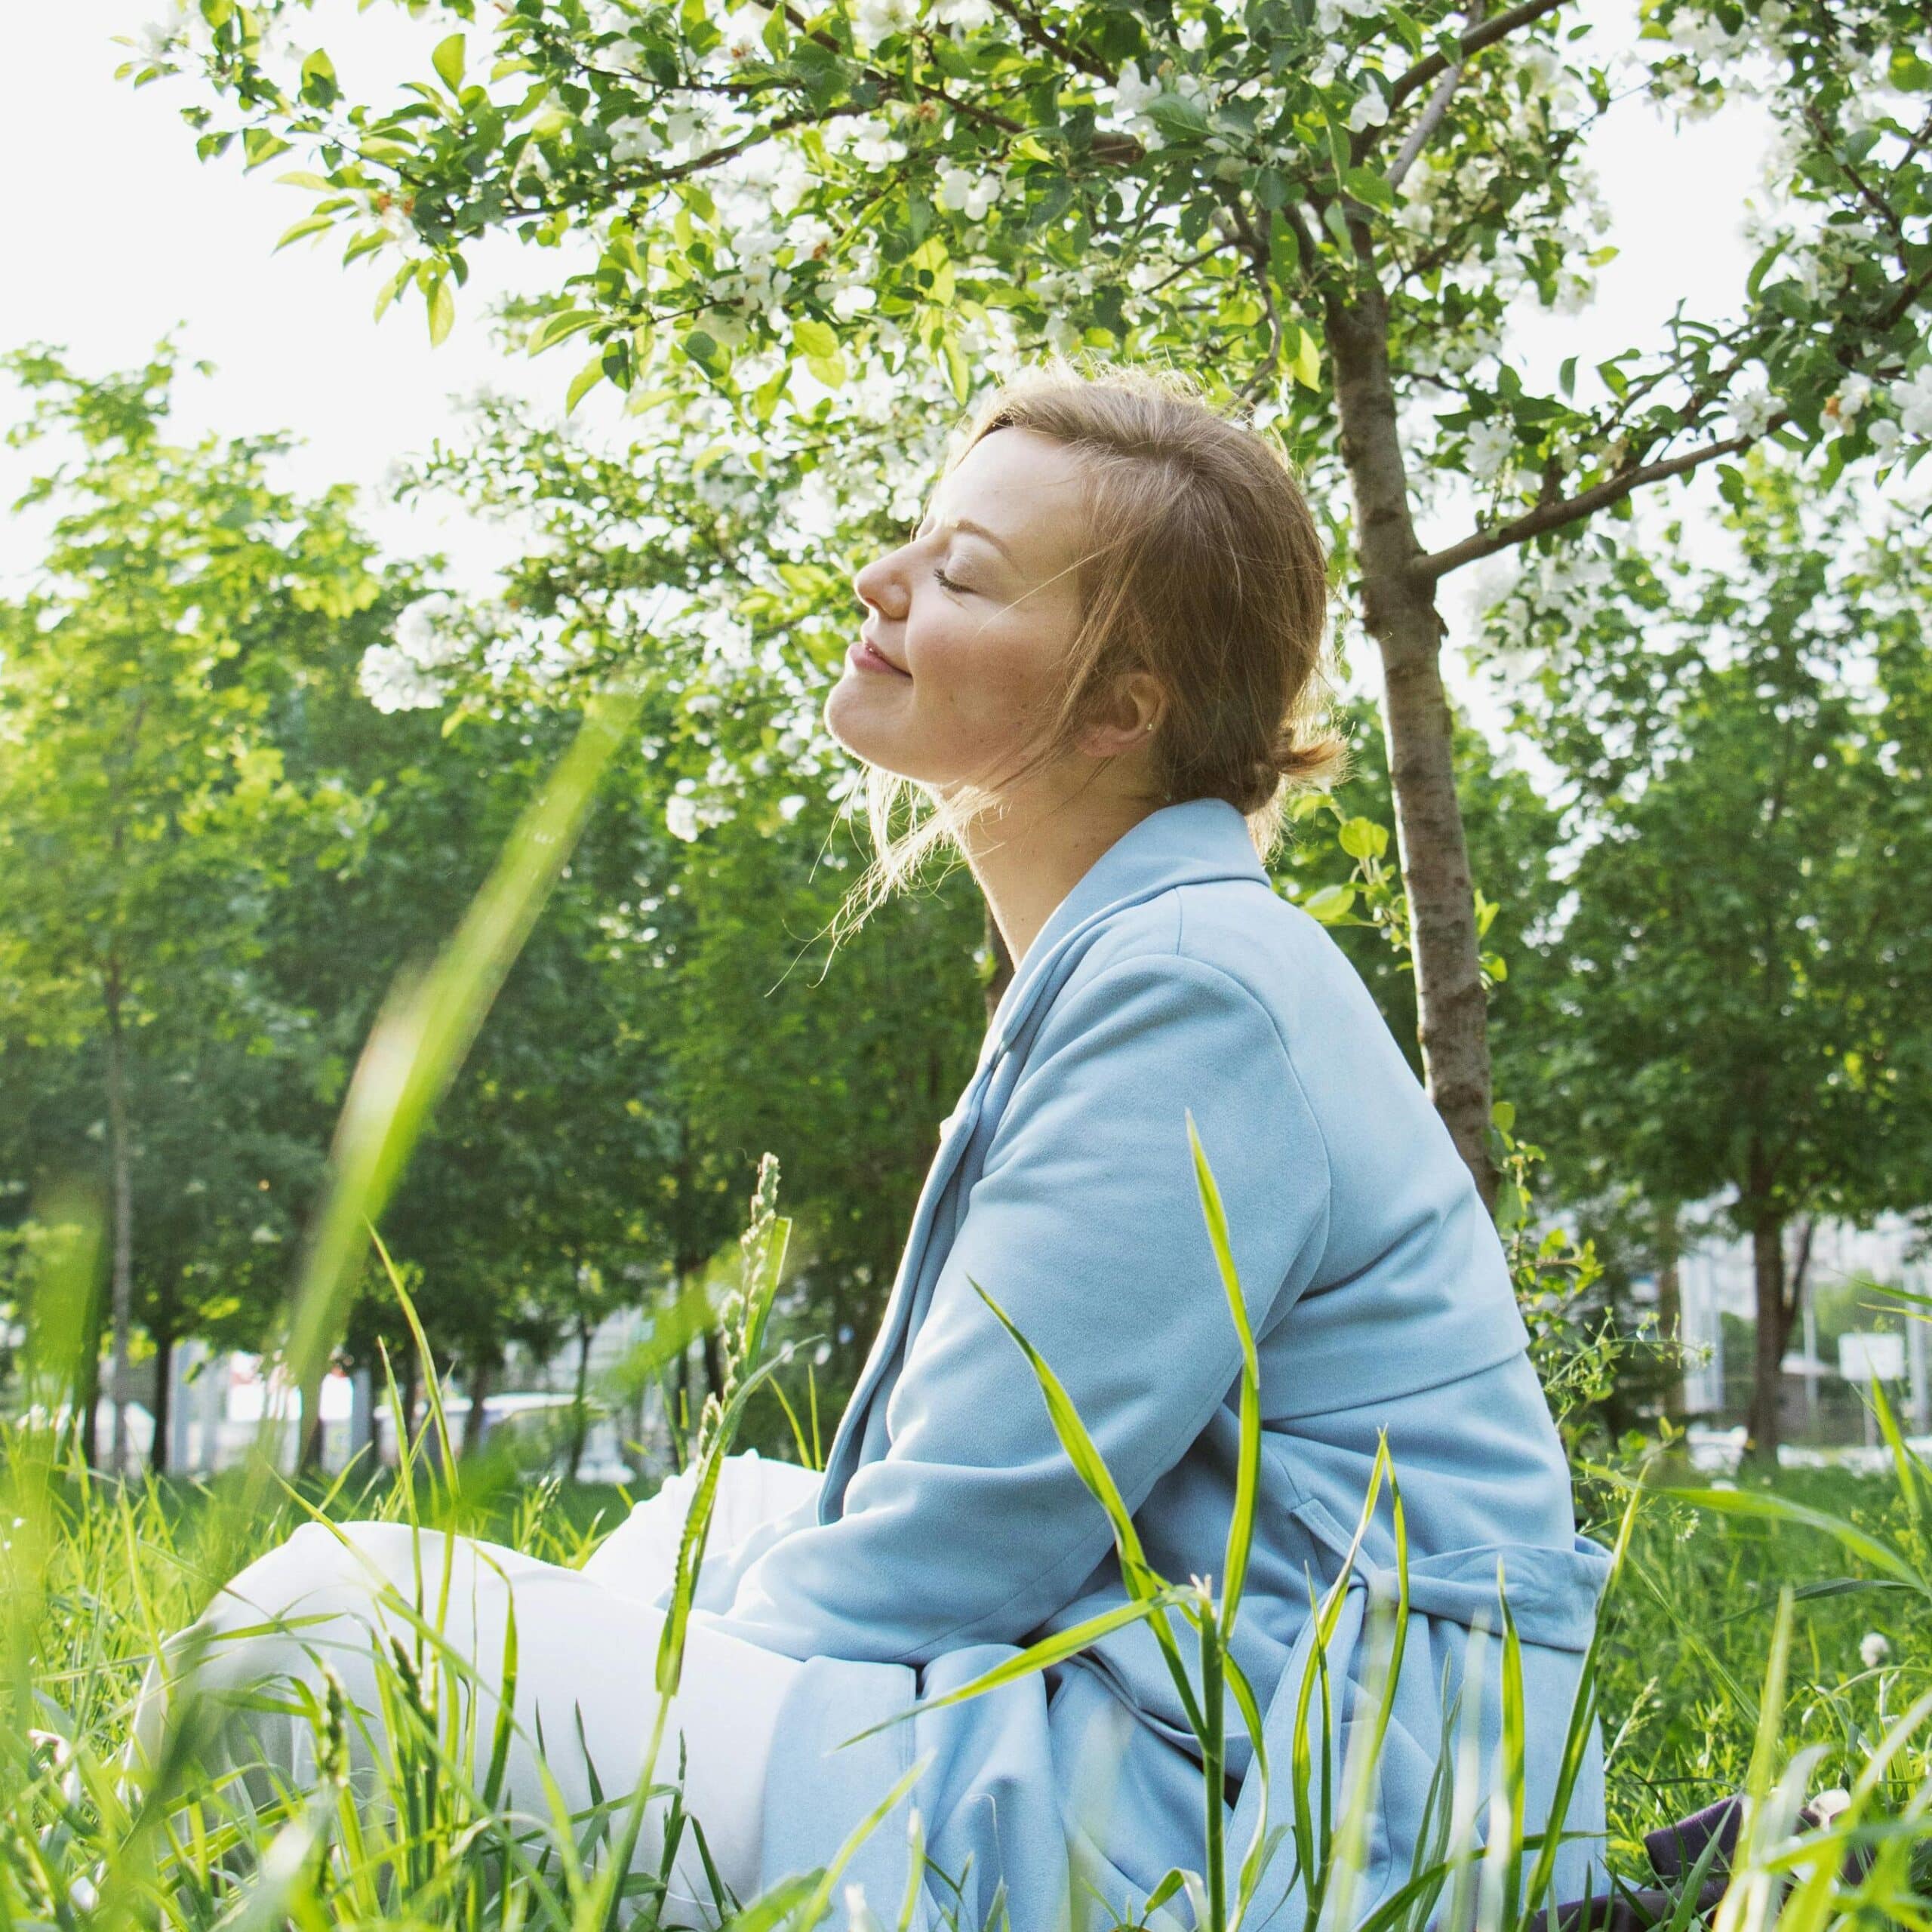
    Man walking in the forest.

    Spring is a beautiful time of year. With blossoms on the trees and flowers in bloom, hearing the songs of the birds and smelling freshly mown grass. A spring walk is the perfect opportunity to soothe your mind and nurture your overall health and well-being. Being in nature has scientifically shown to reduces our cortisol levels and improve our cardiovascular health too!

    Let fresh air into your environment

    Woman sitting by an open window

    After months of closed windows and indoor heating, simply letting fresh air into your home can feel surprisingly revitalising. Opening windows for a few minutes each day helps improve air circulation and indoor air quality, which improves our immunity. A more oxygen-rich environment makes it easier to concentrate and feel more alert during the day.

    Reset your sleep routine

    Sleep is one of the foundations of good health, yet it’s often the first thing to drift when routines change. Spring can be a good time to gently reset sleep habits. Getting natural daylight during the day and allowing time to wind down before bed helps the body return to a more consistent rhythm. This means for the last 1-2 hours before bed you should try avoiding the use of screens and only use gentle warm light (such as a lamp).

    Be a little kinder to your mind

    Just as we clear clutter from our homes in spring, it can also help to clear some of the pressure we put on ourselves. Many people carry a constant internal dialogue of “I should be doing more” or “I’m not doing this well enough”. Practising a little self-kindness can help shift that pattern over time. You don’t have to forcefully say positive things to yourself. Instead, try this: don’t allow your negative thoughts to replay in your mind, instead accept the thought and just let it pass by. You can also try acknowledging three positive things that went well every day. Doing this consistently helps our positivity and develop a resilient mindset.

    Positive affirmation "you are enough".

    In summary

    Spring reminds us that change doesn’t happen all at once. It happens gradually: a little more daylight each day, trees beginning to bud, and the world slowly feeling more alive again. Our health often works in the same way. Small habits like getting outside, moving a little more, sleeping better, and being kinder to ourselves will gradually help restore energy, clarity and balance. Over time, these small changes can leave you feeling a little more refreshed, focused and energised, much like the feeling after giving your home a good spring clean!

    Published 20/03/2026

    PS: You know about osteopathy, but have you heard about visceral manipulation? Learn more here.

    Understanding Visceral Manipulation: Supporting the Body from the Inside Out

    When you think of osteopathy, it is often associated with the treatment of muscles, joints, and nerves. However everything in our bodies is connected, so it’s important to treat other parts of the body too. This is why I decided to complete the visceral manipulation (VM) part 1 course with the Barral Institute. In this article I’ll explain about VM and how it can help you. I also share my personal experience of being a patient receiving VM. I noticed some unexpected changes in my own body, which inspired me to share my experience with you (to skip to the video click here!) 

    What is visceral manipulation?

    Visceral manipulation (VM) explores how the internal organs relate to the rest of the body — particularly the spine, diaphragm, and nervous system. If an organ is under strain or restricted, it may give subtle digestive symptoms, or it could affect the surrounding tissues. For example, the liver can refer pain into the right shoulder.

    VM is a manual therapy consisting of gentle, specifically placed techniques to encourage normal tissue function of the organs, which also helps their connective tissues and surrounding areas. Practitioners will assess motion in the organs to see whether there are restrictions or reduced movement.

    There are two types of movement your VM practitioner will assess: 

    Mobility – how an organ moves in response to external forces such as breathing, posture, and everyday movements like bending or twisting.

    Motility – subtle motion within the organ itself. It has its own inherent movement and activity that is not influenced by external force.

    If there is dysfunction in either type of movement, rather than forcing change, the goal is to listen to these movements and support areas that may feel restricted or under strain.

    Do the organs influence muscles and joints?

    The abdomen and spine are closely linked through shared fascial connections and nerve pathways. For example, restrictions around digestive organs can sometimes influence how the diaphragm moves, which in turn can affect breathing patterns, posture, and spinal comfort.

    This is one reason visceral work may sometimes be considered in combination with standard osteopathy techniques for people with persistent back ache or recurring tension, particularly when symptoms don’t fully respond to more familiar approaches. 

    What About Digestive Symptoms?

    Visceral manipulation may be relevant for some people experiencing digestive-related discomfort such as bloating, feelings of heaviness, or general abdominal tension. Rather than focusing on symptoms alone, osteopaths look at how the organs move, how the diaphragm functions, and how the nervous system responds to stress and strain.

    The aim is not to “treat” specific medical conditions, but to support the body’s natural movement and adaptability. Some people describe feeling more comfortable, less restricted through the abdomen, or more able to breathe fully following treatment. As always, everyone’s experience is individual – and this is why I want to share my experience with you!

    What Does Treatment Feel Like?

    When a practitioner works on improving motility, it feels very gentle and subtle. It can often feel relaxing and calming. Treatment for mobility feels firmer in comparison to motility, but it is still relatively gentle. The practitioners hands are soft, and often they will direct their pressure in the way that feels easiest and most relaxed. It may occasionally feel tender or sensitive if an area is particularly tight, but this feeling is temporary and settles quickly.

    Listen to how VM helped my chronic symptoms of a ‘lump in the throat’ feeling:

    Would you like to try Visceral Manipulation?

    Visceral manipulation is one part of a wider osteopathic approach. It works alongside medical care and other therapies, with the aim of supporting your body and overall wellness. Every treatment is tailored to the individual, and any approach used is guided by what feels most appropriate for your needs.

    If you’re curious about visceral manipulation or wondering whether it might be suitable for you, I’d be happy to have a chat. You can book an appointment here. Alternatively, you can send an enquiry to info@josteopathy.com, or we can talk about it together during your next appointment.

    PS: Over the next few years, I am looking to complete parts 2-5 of the visceral manipulation course (part 2 is September 2026!). This will cover other organs in the body, so watch this space!

    PPS: Do you have a shoulder issue? Read this guide.

    Published 13th February 2026

    A shoulder to lean on: your rehab guide to frozen shoulder

    Shoulders are incredibly mobile, so when they become painful or stiff it can be debilitating. Simple things like putting on a coat or reaching into a kitchen cupboard can suddenly feel difficult. Frozen shoulder is a common cause of shoulder pain and stiffness. In this guide, I explain what’s going on and how a combination of hands-on treatment and simple home exercises can help you manage symptoms and support recovery.

    What is frozen shoulder?

    Frozen shoulder (adhesive capsulitis) is a condition where the capsule around the shoulder becomes thickened and irritated, leading to pain and stiffness. It usually develops gradually without a clear injury. In some people, it can be triggered by a period of reduced shoulder movement, for example after surgery. It is more common in people aged 40–60, and more likely to occur in those with certain conditions such as diabetes, thyroid conditions or Parkinson’s disease.

    Frozen shoulder usually changes over time and progresses through stages. Understanding these stages helps guide treatment and recovery.

    Stage 1: Painful (Freezing) Stage – 3 to 9 months

    There is increasing pain and inflammation in the shoulder. Movement is very painful and range of movement begins to reduce. 

    Stage 2: Stiff (Frozen) Stage – 4 to 12 months

    The pain reduces, but shoulder becomes a lot stiffer, making everyday tasks difficult to do.

    Stage 3: Recovery (Thawing) Stage – 6 to 12+ months

    Pain continues to settle and movement slowly returns.

    The good news is that frozen shoulder usually resolves over time, however it commonly takes 1-3 years to resolve. They key to treatment and guided exercises are to help manage the pain and preserve as much movement as possible. Even if it feels like you are progressing very little, please do not give up your exercises! Consistently stretching your shoulder will help you in the long-term to recover more movement in your shoulder.

    Rehab guide

    If you are unsure what stage you are in or how best to exercise your shoulder, a tailored assessment can help guide you safely.

    Stage 1 (Freezing)  

    The main aim of treatment at this stage is to settle irritation while keeping the shoulder moving comfortably. Osteopathic treatment is gentle and focuses on reducing strain in surrounding areas such as the neck, upper back, shoulder blades, ribs and mid-back. Rehabilitation exercises are kept light and controlled, as forcing the shoulder at this stage can increase pain and irritation. A perfect example is pendulum swings, shown in this video below:

    Stage 2 (Frozen) 

    At this stage, treatment becomes more movement-focused. Manual therapy aims to encourage joint mobility, while rehabilitation exercises gently stretch the shoulder. Improving shoulder blade control and mid-back movement is especially important, as better movement here can reduce strain on the shoulder joint itself. Home exercises at this stage focus on stretching the shoulder, neck and upper back. In particular stretches that are assisted by your non-painful arm are particularly helpful:

    0:00 – Shoulder internal rotation  1:18 – Shoulder external rotation  2:30 Shoulder flexion

    Stage 3 (Thawing) 

    At this stage, treatment focuses on rebuilding strength, coordination and confidence in the shoulder to support a return to everyday activities. You’ll continue with exercises from stages 1 and 2, while gradually adding strength-based rehabilitation to build resilience in the shoulder. There isn’t a one-size-fits-all strengthening programme, as exercises need to be tailored to individual needs and lifestyle. That said, some exercises, such as resistance band rows, are safe and appropriate for many people at this stage.

    A shoulder to lean on

    Home exercises play an important role in frozen shoulder recovery. Done little and often, they help reduce flare-ups, maintain movement and support long-term progress — even when change feels slow.

    However, knowing what to do, how much to do, and when to progress isn’t always straightforward. An in-clinic assessment allows treatment and rehabilitation to be tailored to your specific stage and symptoms, while also addressing the neck, mid-back and shoulder blades.

    If shoulder pain or stiffness is affecting your day-to-day life, book an appointment or send a query to take the next step.

    P.S. Are you struggling with your New Year’s goal? If so check out my last blog on habit stacking, so you can commit to your goal with far less effort!

    Published 16th January 2026

    Habit Stacking: Small Changes That Lead to Real Results

    Every January starts the same way. Big goals, good intentions, and a brief period where everyone believes this is the year it all changes. Then life gets busy, motivation dips, and those carefully planned resolutions quietly disappear. So instead of asking you to try harder, I’m going to teach you about ‘habit stacking’, so you can commit to your New Years Resolutions with far less effort!

    Why Most Habits Don’t Stick

    We all know habits are hard to make and easy to break. Most health goals require extra time, extra effort, and extra motivation. Unfortunately those three things aren’t in unlimited supply. It is a challenge fitting new routines into days that already feel full. Habit stacking solves this by working with your existing routine, not against it.

    What is Habit Stacking?

    Habit stacking means adding a new healthy habit onto something you already do regularly. Rather than relying on memory or willpower, you use part of your daily routine as a “cue” — making the habit far more likely to stick.

    Think about how your day already runs. You wake up, brush your teeth, make a cup of tea, eat meals, sit down at work, collapse onto the sofa in the evening. None of these require motivation, they just happen. Habit stacking uses these moments as opportunities for healthier behaviour. In summary:

    How to Start Habit Stacking

    First, decide what new habit you would like to build. Keep it as small and specific as possible. Here are some examples.

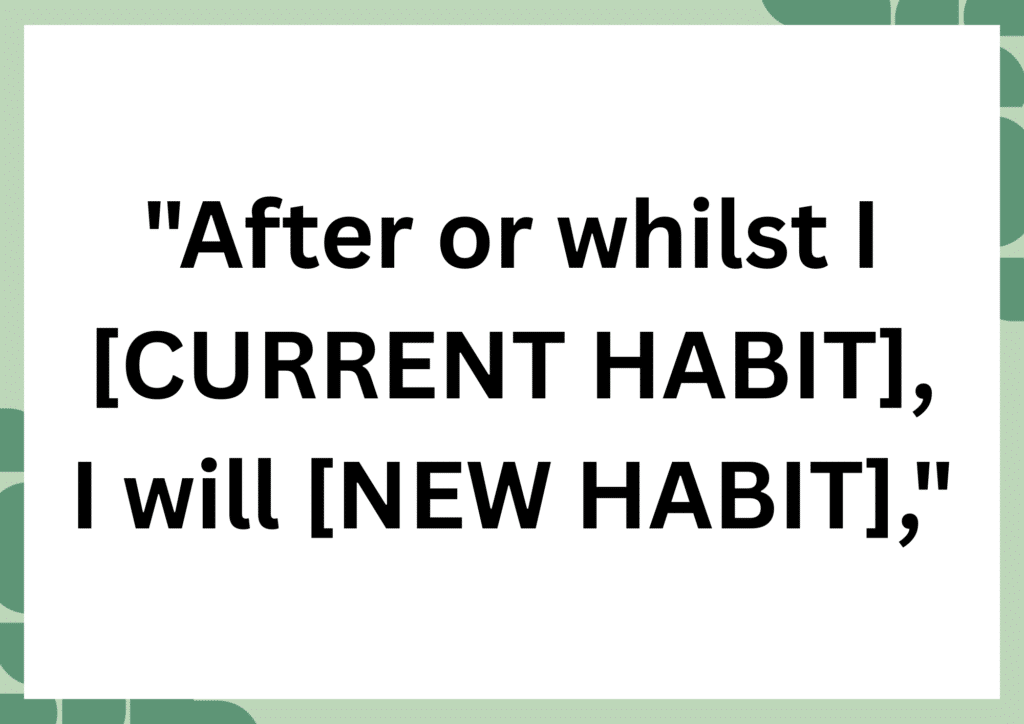
    “After I clean my teeth, I will take my supplements.”

    “After I work for 1 hour, I will do 10 squats.”

    “While the kettle is boiling, I will put on my trainers so I can then go for a walk with my flask.”

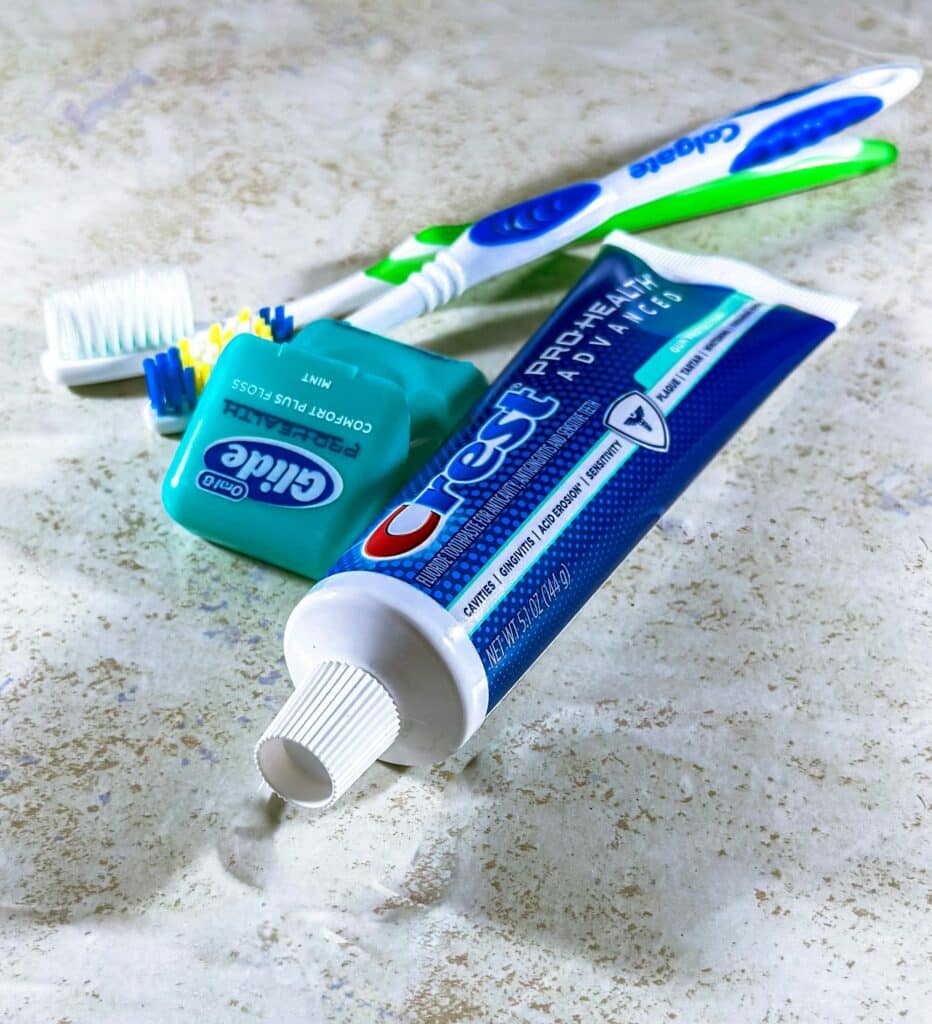
    You may also prefer to use visual cues to support habit stacking. For example, putting floss next to your toothbrush makes it harder to forget flossing. Folding your gym clothes on the bed in the morning can prompt you once home from work to get changed and go straight to the gym.

    It’s also worth choosing a calmer time in your day. For instance if mornings feel rushed, stack your habit in the afternoon or evening. You can adjust your habit stack to suit any daily routine changes or goal changes.

    Visual cue for flossing

    The Key: Consistency and Small, Specific Goals

    If you take one thing from this, let it be this: small habits done often beat big plans done occasionally. For this New Year, choose one small habit that would genuinely help your health, attach it to something you already do regularly, and let the routine do the work.

    Be kind to yourself – habits take time. But once it’s established, it’s far more likely to last. And that’s how small changes lead to real results.

    PS: Incase you missed it – Learn these 3 breathing techniques to bring calm to your day.

    Created Tuesday 16th December 2025

    Breathe Better: 3 Easy Breathing Techniques to Bring Calm to Your Busy Day

    It’s easy for the day to gather pace — plans, work, expectations, and the need to stay on top of everything. Without realising it, our body starts running in stress mode. However, by simply taking a few moments to reconnect with your breath, it can shift you into a calmer, supported and focused state. This article is here to guide you on why breathing efficiently is important, with 3 simple breathing techniques you can try to help you achieve this.

    What Is “Good” Breathing?

    We breathe all day without thinking, but how we breathe changes depending on how we feel. When we’re stressed or rushing around, our breath can become shallower and higher into the chest. This can tighten the neck, shoulders and back, and signals to the nervous system that we need to stay alert.

    “Good” breathing uses the diaphragm more efficiently, as it’s the main breathing muscle located beneath the lungs. When it’s working well, the abdomen and lower ribs gently expand as we breathe in, and soften as we breathe out. This improves the amount of air moving in and out of our lungs, helping the breath become steadier and deeper.

    Efficient breathing also stimulates the nervous system to ‘relax’. (see my previous article on the vagus nerve). When we’re relaxed, our heart rate becomes steadier and blood pressure lowers. Breathing efficiently with our diaphragm reduces overuse of the muscles in our neck, shoulders and upper back, which can ease tension in these areas. Because the diaphragm attaches on our lower ribs, core and mid-low spine, using it more efficiently can improve our stability and control.

    Finally, breathing gives us an opportunity to focus on the present moment. Practicing regular breath-work helps us become less reactive, regulate our emotions, and feel less overwhelmed.

    How can I breathe more efficiently?

    The first step is to understand how you currently breathe. You should review this regularly so you can monitor changes over time. There are 2 main movements for the ribs: ‘pump handle’ movements (up and down’), and ‘bucket handle’ movements (sideways expansion/contraction). The following exercises cover both movements.

    Once you are comfortable understanding how you breathe, you can try the box breathing technique to help you feel calm and ‘reset’.

    Breathing Awareness Exercises

    1. Upper Chest vs Abdominal Breathing

    Step 1 — Monitor

    1. Place one hand on your upper chest and the other on your abdomen.
    2. Let your shoulders stay relaxed throughout.
    3. Breathe in slowly through your nose.
    4. Notice which hand moves more — the chest or the abdomen.
    5. Exhale gently.

    Repeat for five breaths without changing anything yet.

    Step 2 — Diaphragmatic Breathing

    1. Keep your hands where they are.
    2. As you inhale, allow the abdomen to expand a little further under your lower hand.
    3. Try to keep the chest and shoulders relaxed.
    4. Exhale and let the abdomen soften.

    Repeat for five slow breaths, aiming for smooth, rather than forced, movement.

    2. Sideways Rib Expansion (Lower Rib Breathing)

    1. Place your hands around the sides of your lower ribs.
    2. Let your shoulders stay relaxed throughout.
    3. Inhale through your nose for a count of 4, feeling the ribs widen gently outward into your hands.
    4. Exhale for a count of 4–6, allowing the ribs to soften back in.
    5. Continue for five breaths.

    We’re looking for outward expansion rather than the breath lifting into the chest or shoulders.

    3. Box Breathing

    • Sit upright and allow your shoulders to relax.
    • Breathe in through your nose for 4.
    • Hold for 4.
    • Exhale for 4.
    • Hold for at the end of the exhale.
    • Repeat for 4–8 cycles.

    TOP TIP: Move at a pace that feels steady, never strained. If you need to shorten the holds or lengthen your exhale that is okay. The goal is relaxation, not perfection.

    Allowing yourself a minute of calmness improves productivity

    So next time you’re rushing around, remember the importance of allowing yourself to have 1-2 minutes of mindful breathing can make you feel calmer and more focused. By giving ourselves that time to reconnect with our breath, we’re not trying to escape stress — we’re simply giving the body the space to move through it with calmness, comfort and clarity.

    In case you missed it my last article: Strength training doesn’t have to be scary: 5 simple exercises to build strength and confidence

    Created 14/11/2025